Amazing, No-Bake, No-Guilt Watermelon “Cupcakes”!
 Refreshing and cold, these “cupcakes” will delight your family and guests, especially when they realize they are natural, healthy and dairy-free and gluten-free! For creative food decorators out there, get your “juices” flowing—the possibilities are endless. The recipe below is as simple as can be but there’s plenty of room for decorative primping, if that’s what you’re into (and I know alot of you are!). Naturally, kids will love them—both decorating AND eating!
 In my popular, previous post, The Amazing Easy No-Bake Watermelon Cake (click here), I experimented with the idea of using juicy, cold watermelon as the basis of a “cake.” The results were wonderful to behold and eat—Vegan American Princess continues to have an overwhelming response to the recipe and the photos. So the mad, vegan scientist in me decided to take the Watermelon Cake a step further and jump on the cupcake bandwagon—only these cupcakes won’t leave you feeling sick, fat, unhealthy or regretful!
Amazing, No-Bake Watermelon “Cupcakes”
Ingredients
1 large oval watermelon, seedless
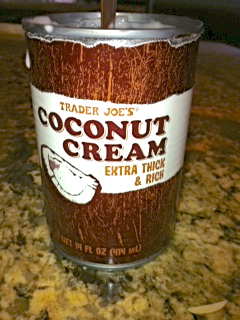
1 can Trader Joe’s Coconut Cream, Extra Thick & Rich
2 tsp agave syrup
2 tsp vanilla extract
slivered almonds, shredded coconut, cacoa chips
fresh sliced banana & sliced strawberries & blueberries
a can with both top and bottom taken off
Method
1) Extremely important: place a can of coconut cream in the coolest part of refrigerator overnight or for at least 10 hours. This will allow the coconut cream to chill and thicken.
2) Next day: Take out your electric mixer and put the small bowl and the beaters in the freezer. If you have beaters that are whisks, use them!
3) Carve the watermelon-–Basically what you want to accomplish is to have use of as much of the watermelon without the rind as you can to work with. Since they come in varying shapes and sizes, this is not an exact science, but fear not! Lay the watermelon on it’s side and cut off the top and the bottom. You should be left with a circular, cake-shaped piece. Try your best to level the top and bottom as evenly as possible. Take that center piece and cut in half, across the wide way. Place the pieces upright so the rind is vertical.

4) Cut off the rinds, in an up and down motion, carefully leaving just the pink fruity cake-shaped pieces. Trim off as much of the white rind.
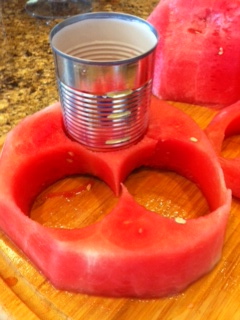
5) Take the tin can and take off the top and bottom with a circular can opener. Clean and rinse the can, making sure there are no sharp edges. Study your first piece of watermelon and roughly measure out with the end of the can about how many circles you can get from the piece. It’s best to maximize the amount of watermelon the you have so that you come out with as many “cupcakes” as possible.
6) Using the can almost like a cookie cutter, push into the watermelon all the way to the bottom surface (plate, cutting board, counter). You should have a cylinder-shaped piece of watermelon in the can. Push it out carefully but firmly from one end of the can, so that it comes out the other end. Place on a plate. Repeat until you have made as many watermelon cylinders as you can from you watermelon. It’s ok if they aren’t perfect or the same exact height. Put in the fridge to keep cold.
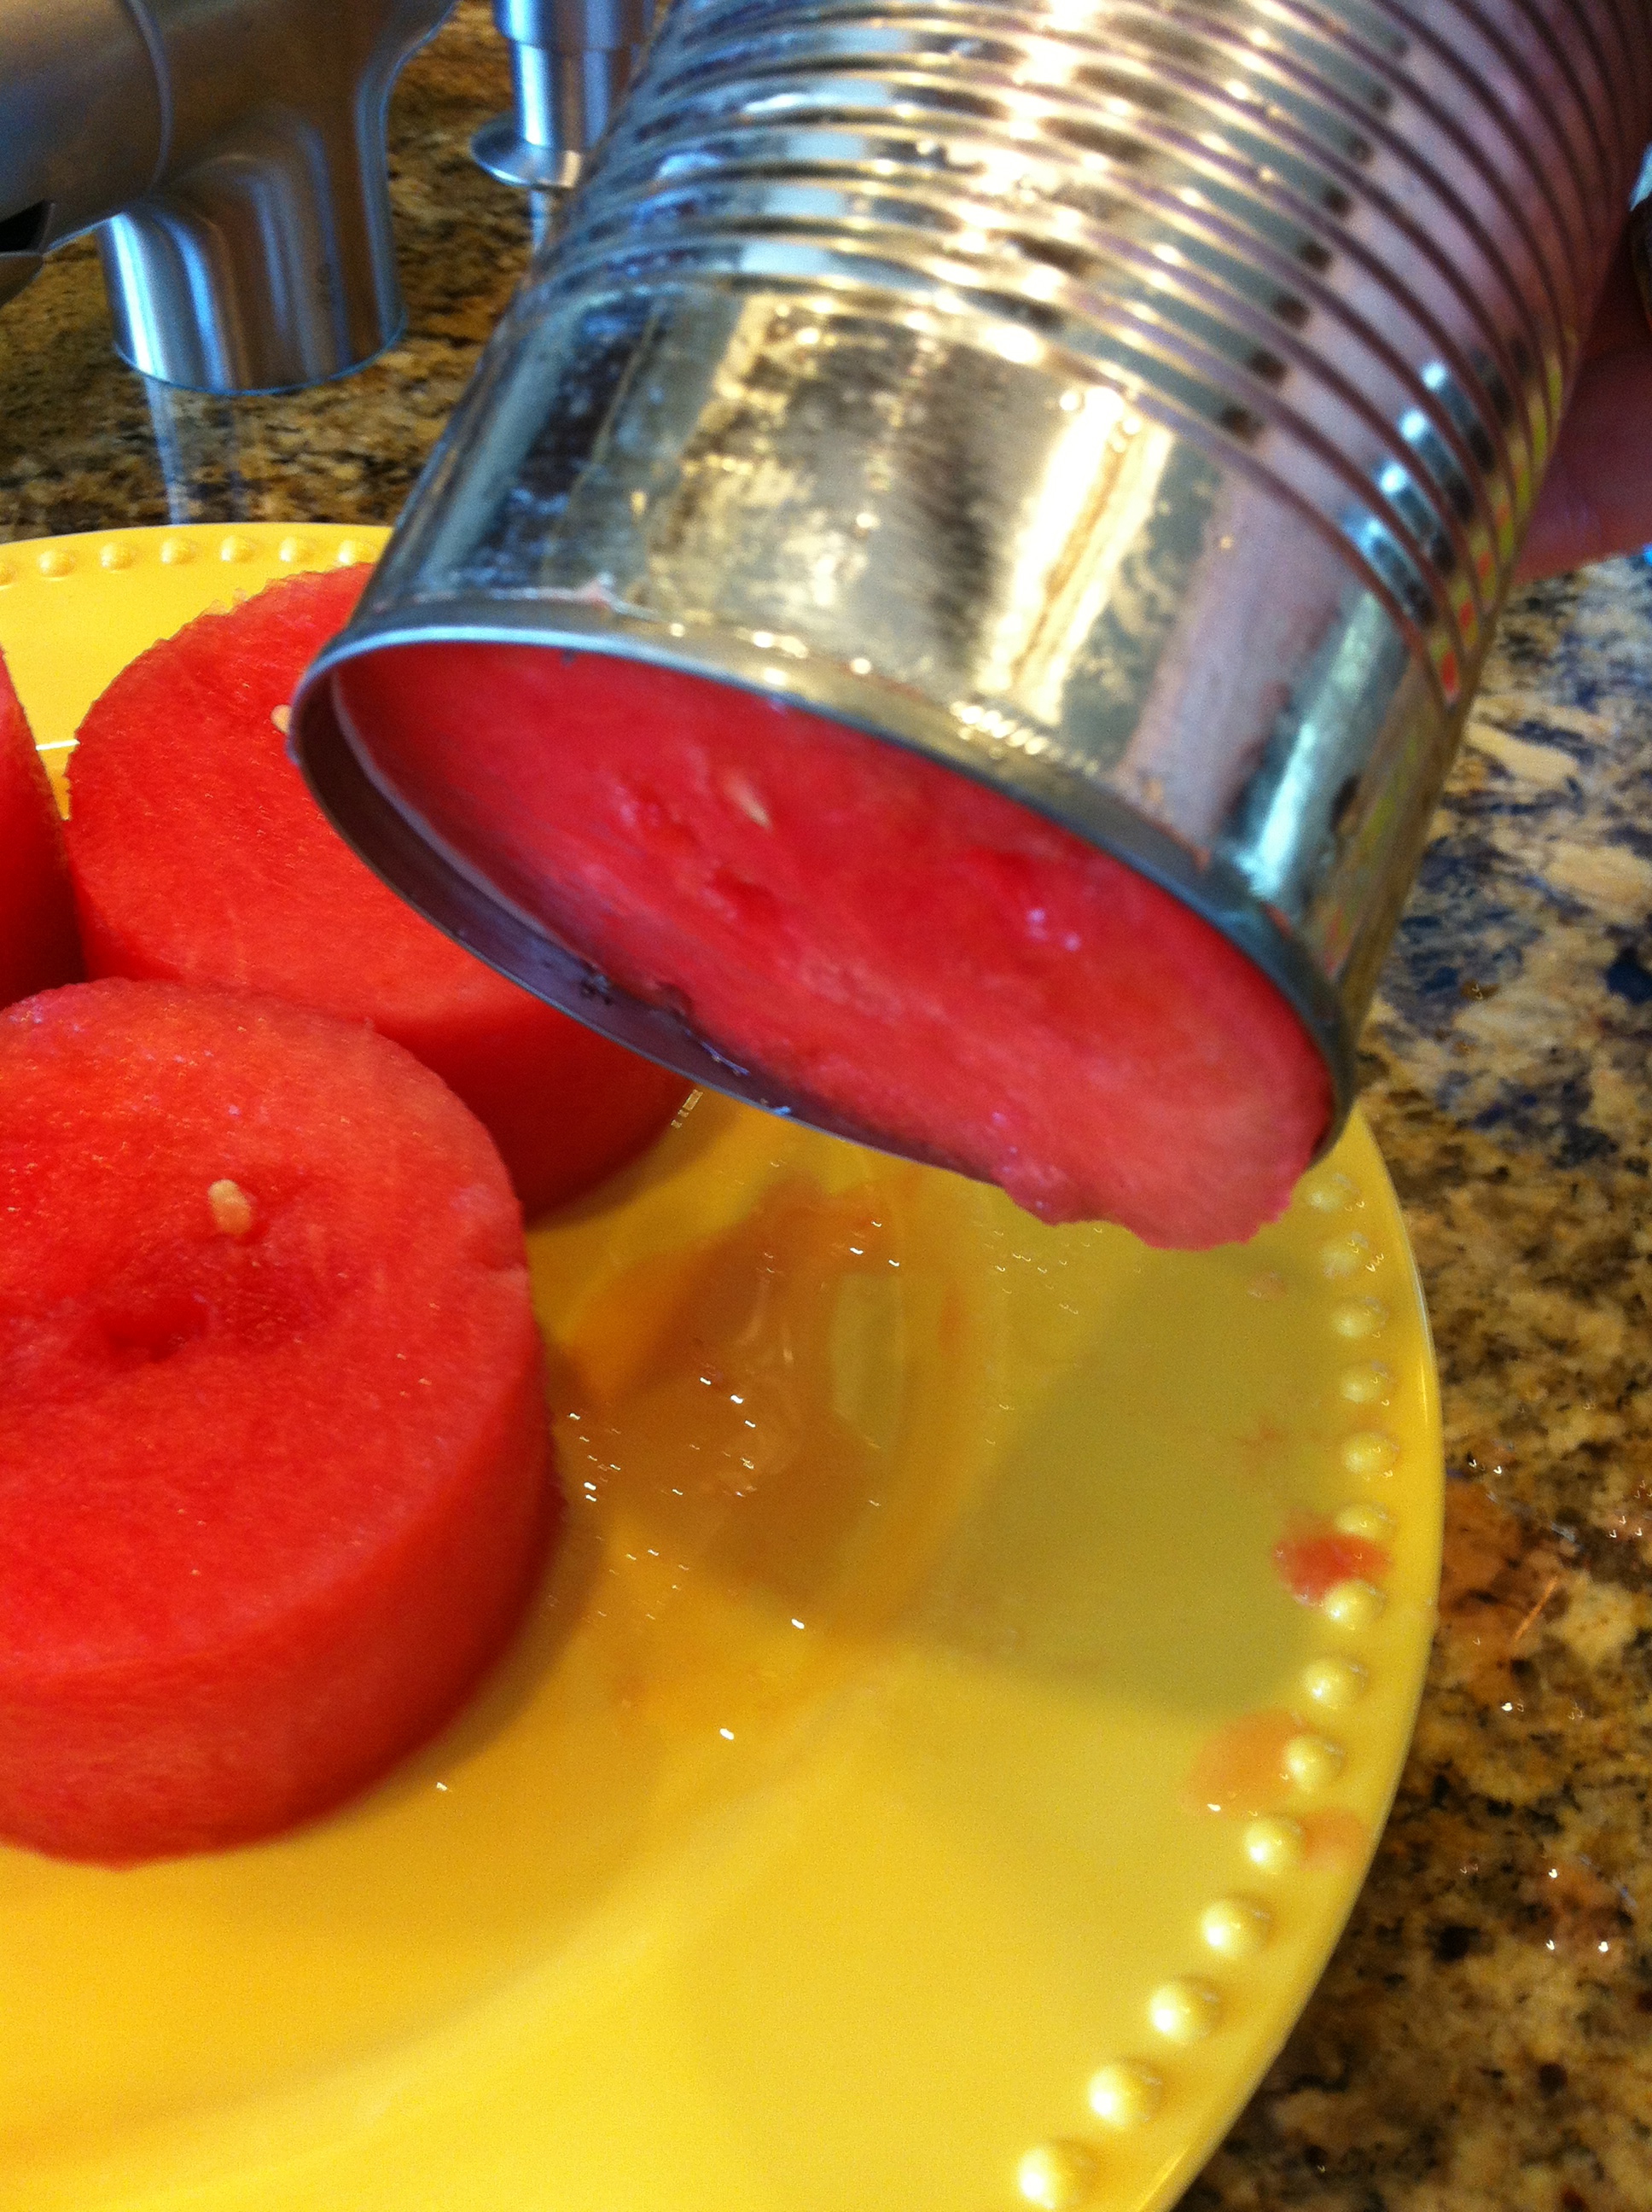
7) Keep the watermelon remainders to cut up and eat later!
8) Take the can of coconut cream out of the fridge. Open with a circular can opener. The cream should be thick and firm. If there’s any liquid, carefully pour it off and discard.
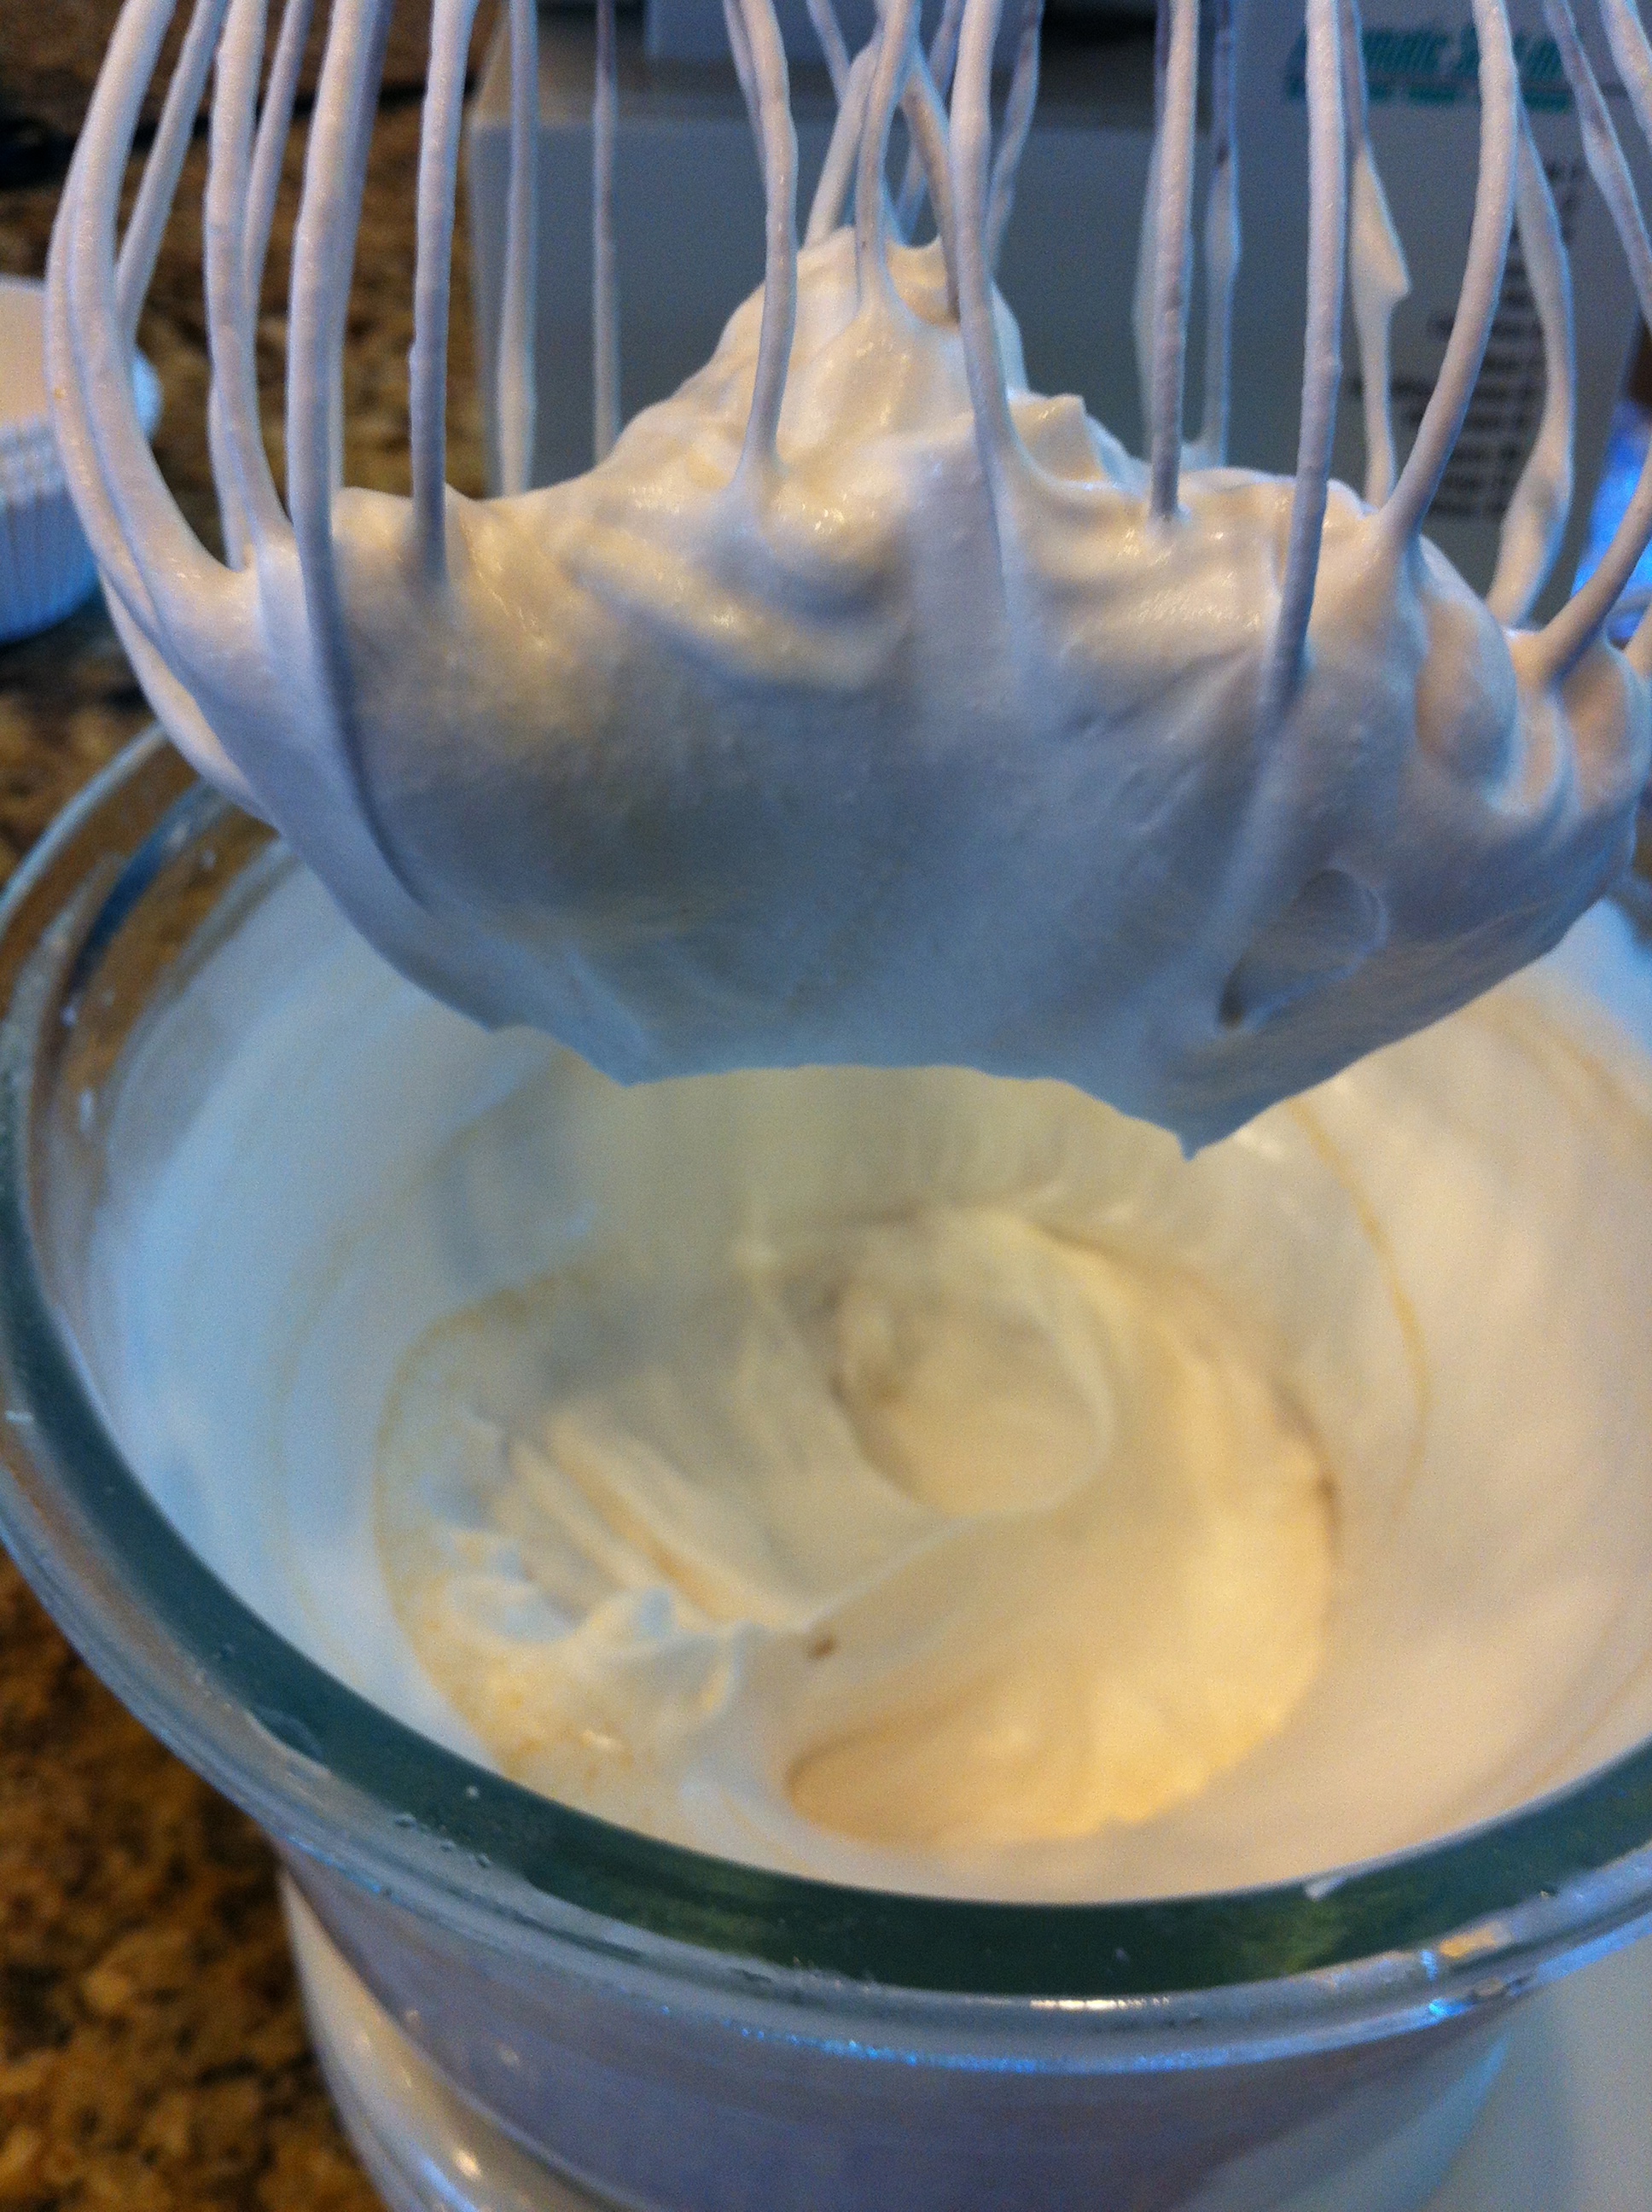
9) Take out the mixing bowl and whisk-beaters from the freezer and set up on your electric mixer. Scoop out hardened coconut cream from the can and put it into the cold bowl. Start whipping the cream with the electric blender, adding the agave syrup and vanilla extract. It should become thick and airy, just like dairy whipped cream within a couple of minutes. Put the bowl in the fridge until you’re ready to frost.
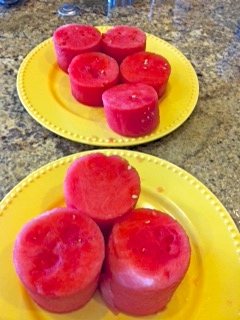
10) Take your watermelon cylinders from the fridge and determine the heights you would like to create. I made a few short and a few tall. With paper towels, dab and blot up as much liquid and juice as possible.
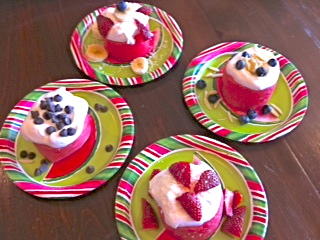
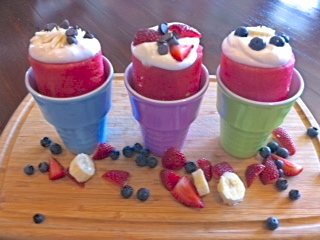
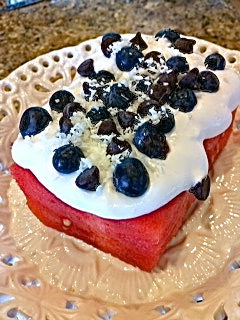
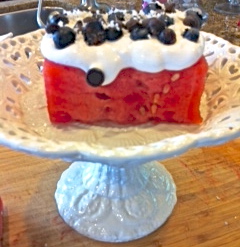
11) Set up your serving dishes—they can be decorative bowls, plates, ice cream dishes etc. I had some and bought a few more at Michael’s for $1 each. Place the watermelon “cupcakes” in these bowls. Take out the frosting and spoon the frosting onto the top of each “cupcake.”
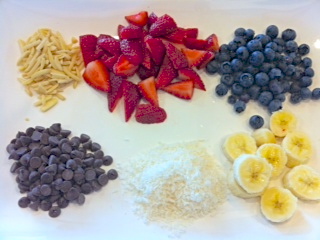
12) Sprinkle with slivered almonds, shredded coconut, cacao chips. Place fresh fruit on the tops.

13) Serve immediately. It may keep in the fridge for a couple of hours but that depends on how ripe the watermelon is.
Notes:
1) Since making whipped cream from coconut cream always requires overnight chilling, keep a couple of cans in the fridge all the time for convenience.
2) The whipped cream can be flavored with maple syrup, chocolate, or other flavors. Experiment!
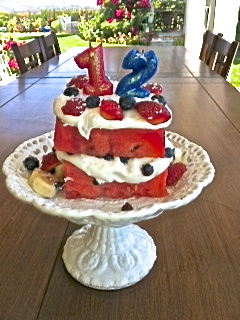
I had some extra pieces and squared them off and make a mini-layer birthday cake! So much fun!!

Enjoy!
xox Ellen


Very creative and fun
Thank you Sumara!
Thanks! Sumara, if you decide to make these, let me know how they come out!